
July 1, 2013
With vacation quickly approaching and our vacation fund almost empty from this past month's family emergency, we have decided to do a No Spend Month. Besides our monthly bills, we are aiming to spend less than $500 on groceries, fuel and luxuries (the hubby smokes). With this attempt, I'm hoping to empty our cupboards a little, get some extra (DEEP) cleaning done around our home, compare our monthly utilities to make sure we aren't over paying for any services, look into other ways we can save money daily (DIY and homemade money savers) and spend some quality time with our three wonderful dogs. The balance available to spend should also help us restrict our dinning out. One day, I dream of only going out to eat on special occasions. Right now, its way too close to being incorporated in our everyday life. The busier we get with work (my husband and his father run a busy bike rental company, Reedy Rides ) and social obligations, the easier it is for us to slip up and head out.If we have a medical emergency, if we need work related items or if we have an automotive issue, I'm not including that into our $500 budget. I want to save money but not at the cost of our health, our jobs or potentially putting off something that may worsen (car maintenance) and in the end cost even more.I am planning on posting weekly updates on how we do on our budget for No Spend July :) Right now, I'm afraid I've spent too much on groceries and I'm praying it'll last us! There was a amazing deal on meat at the grocery store. My sale-thriving heart just couldn't pass it up! Buy one, get one free chicken breast AND buy one, get one free Boston butts! Can you say Homemade BBQ Pulled Pork in the Crock Pot?!? With Homemade Cole Slaw and baked beans?! Just in time for 4th of July and at an awesome discount!Do you have a favorite free date?
How do you and yours save extra money?When is it easiest for you to save money?What makes it hardest for you to save money?Feel free to comment below
July 7, 2013 Seven days into No Spend July! July 1st we splurged huge on groceries. We spent $70 instead of the $35 I had budgeted. When we did that, consciously, we had stocked up a ton of meat in the freezer that we haven't even thought of touching yet! I just completed the shopping for this week. We accomplished some cleaning that was put off for some time and have definitely spent more time with our fur babies. This coming weeks worth of groceries cost us $29. We spent that on produce, lunch meat, bread, milk, cookies for my hubby since last week we made them from scratch (Cookies are his thing! Oreos, especially! He has to have cookies nearly everyday:) and I don't knock it because he's in better shape than anyone I know! And I love to spoil him). I believe we still have some frozen cookie dough left too! I can actually see part of the shelves in our pantry! I think where we went wrong on our pantry overload is that we had an extra stock of groceries from before we switched to meal planning. In January, we made a bold move and started meal planning to try to cut out processed foods and help my food allergies be narrowed down and eventually eliminated. When we made the switch, we still had a pantry full of impulse buys. Usually, when I had time to make the meal plan and grocery list, I was at work and unaware of what we had left in the cupboards. This would cause me to over buy, mostly the same items. Others may refer to this as stocking up, but when you live in a 800 square foot house with your hubby and 3 energetic dogs. Ain't no one got room for that! I am sure glad to see the food be enjoyed.The first week of no retail therapy (a.k.a. shopping) was pretty tough. I am usually a sale and clearance shopper. My best friend has told me all about what I've missed. I am past the shopping for frivolous things and I don't believe my clothing are "in style" anymore (in a recent visit home my kid sister informed me that I am a hipster.. I said what do you mean? These are my grown up clothes!) However, being a newlywed there are a ton of things our house is lacking; as well as things that we've had since our very first apartments that are barely hanging in there. On top of fighting that urge, a new incredible store has opened right next door to my work. Pure torture! (must use self control!) It is filled with spices from around the world, loose teas, flavored sugars, meat rubs, and flavored salts to cook and bake with! I'm going to include their link on this article because some of you aren't currently involved in a no spend month! (I'm living vicariously through you!)
The Tea and Spice Exchange
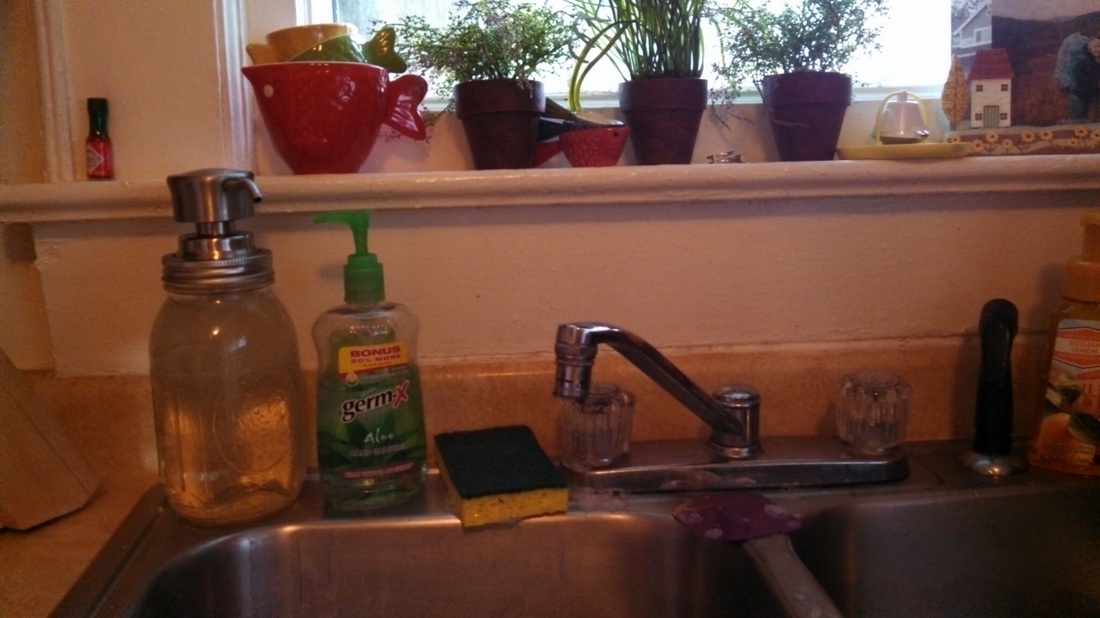
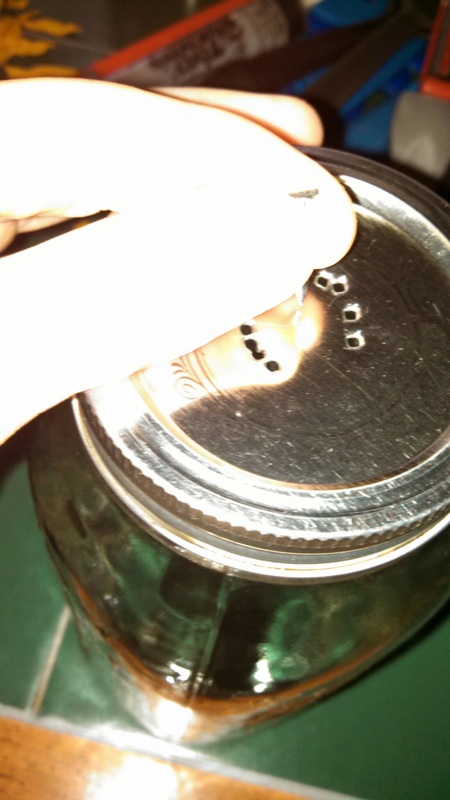
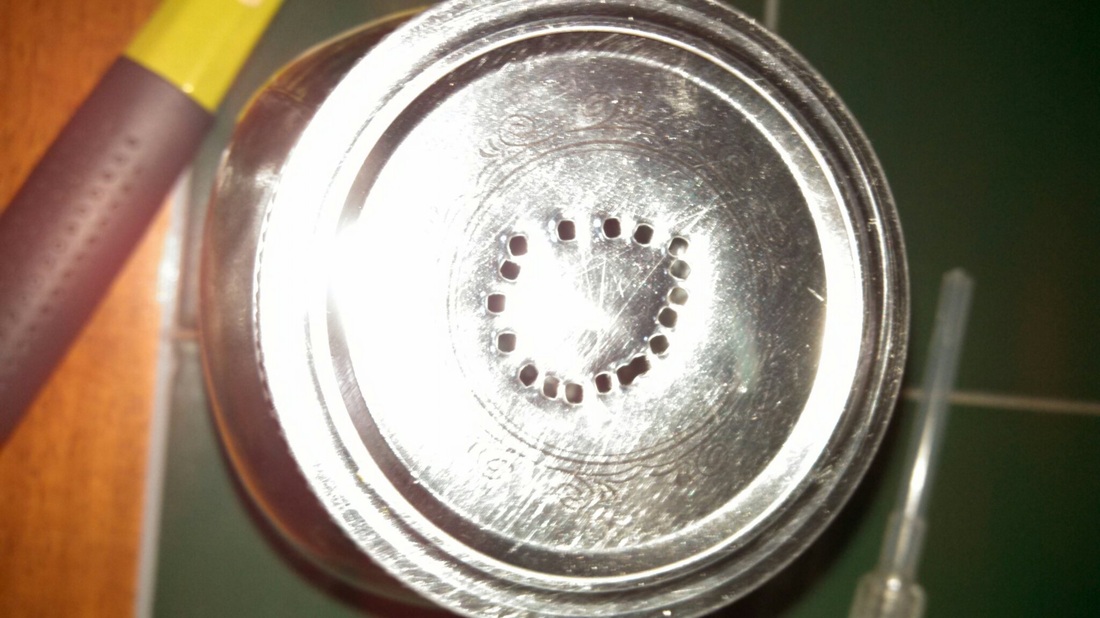
I believe they have 35 stores and still growing! They are all owned by the same couple. If i remember correctly, their names are Bill and Judy, but my memory sometimes escapes me. I had met them while they were doing the renovations for this store. We couldn't have picked a better set of neighbors! If there isn't a store near you, you can order online! I will be using these spices or blends in the recipes that I post later. This week we noticed our dish soap dispenser is leaking. Something I would normally notice and fix or replace.. this time is not able to be fixed.. (We have been buying dish soap on bulk at Costco and filling the dispenser as needed. We don't have a dishwasher so this dispenser is a major part of cleaning the kitchen and everyday life.) My husband has mentioned almost everyday how we need to find a replacement. I've been reminding him we are on a strict budget! Tonight, I laughed and replied, "Do you know what would happen if I told that young boy I was dating two years ago what you just said?" He kinda smiled and laughed and asked "What have you done to me??" On the plus side, our savings account is starting to look great! Instead of using retail therapy, I have been cleaning and reorganizing the kitchen! My best friend is going to be getting a ton of hand me downs for her first home! I also had the time to Clean the Oven, which was way overdue. I found a recipe on Pinterest (I'll share the dirty, and I mean DIRTY details here). My husband and I both had spent a few extra hours at work this past week, which, in turn, will be put back into our savings instead of the usual impulse buys. I had the time to compare a few of our monthly bills against competitors to make sure we are getting the most bang for our buck. And I have been happy with those results. I had found a few homemade recipes to add to my Money Savers Collection. This fall, look for new posts featuring homemade applesauce, crock pot apple butter, no-fail apple pie, DIY candles and if I'm extra gutsy, maybe I'll even attempt some handmade soaps! One week into No Spend July and I am pretty thankful on our decision to give it a shot:) I still don't think it has taken much of a toll on my hubby, he is still happy as a lark, well except for the dish soap dispenser! (I found a DIY Mason Jar Soap Dispenser I am planning on attempting to make! Have to double check that we have the right supplies!)This week we budgeted a little extra cash for our day off. We have planned since April, to take a drive up to the mountains and go tubing down Green River. Last year we visited in April, the water was bone chilling! Took my breath away! This year we planned a bit better, or so we hope! We plan to pack a cooler of sandwiches, snacks and bottled water. Just take the day, drive up the scenic route and lazily float down the river. Catch some rays, have a no fuss lunch and a day off the grid, no electronics. We just so happen to have scored 50% off coupons for each person that goes too! If we can gather some friends and carpool we will be all set! Be sure to check back next week for an update on retail therapy, cleaning and organizing, budgeting groceries and new recipe ideas! What are your favorite fall recipes and traditions?
I'd love to hear from you! Feel free to comment below
The Tea and Spice Exchange
I believe they have 35 stores and still growing! They are all owned by the same couple. If i remember correctly, their names are Bill and Judy, but my memory sometimes escapes me. I had met them while they were doing the renovations for this store. We couldn't have picked a better set of neighbors! If there isn't a store near you, you can order online! I will be using these spices or blends in the recipes that I post later. This week we noticed our dish soap dispenser is leaking. Something I would normally notice and fix or replace.. this time is not able to be fixed.. (We have been buying dish soap on bulk at Costco and filling the dispenser as needed. We don't have a dishwasher so this dispenser is a major part of cleaning the kitchen and everyday life.) My husband has mentioned almost everyday how we need to find a replacement. I've been reminding him we are on a strict budget! Tonight, I laughed and replied, "Do you know what would happen if I told that young boy I was dating two years ago what you just said?" He kinda smiled and laughed and asked "What have you done to me??" On the plus side, our savings account is starting to look great! Instead of using retail therapy, I have been cleaning and reorganizing the kitchen! My best friend is going to be getting a ton of hand me downs for her first home! I also had the time to Clean the Oven, which was way overdue. I found a recipe on Pinterest (I'll share the dirty, and I mean DIRTY details here). My husband and I both had spent a few extra hours at work this past week, which, in turn, will be put back into our savings instead of the usual impulse buys. I had the time to compare a few of our monthly bills against competitors to make sure we are getting the most bang for our buck. And I have been happy with those results. I had found a few homemade recipes to add to my Money Savers Collection. This fall, look for new posts featuring homemade applesauce, crock pot apple butter, no-fail apple pie, DIY candles and if I'm extra gutsy, maybe I'll even attempt some handmade soaps! One week into No Spend July and I am pretty thankful on our decision to give it a shot:) I still don't think it has taken much of a toll on my hubby, he is still happy as a lark, well except for the dish soap dispenser! (I found a DIY Mason Jar Soap Dispenser I am planning on attempting to make! Have to double check that we have the right supplies!)This week we budgeted a little extra cash for our day off. We have planned since April, to take a drive up to the mountains and go tubing down Green River. Last year we visited in April, the water was bone chilling! Took my breath away! This year we planned a bit better, or so we hope! We plan to pack a cooler of sandwiches, snacks and bottled water. Just take the day, drive up the scenic route and lazily float down the river. Catch some rays, have a no fuss lunch and a day off the grid, no electronics. We just so happen to have scored 50% off coupons for each person that goes too! If we can gather some friends and carpool we will be all set! Be sure to check back next week for an update on retail therapy, cleaning and organizing, budgeting groceries and new recipe ideas! What are your favorite fall recipes and traditions?
I'd love to hear from you! Feel free to comment below
July 17, 2013
I went grocery shopping on Monday. I didn't need to get much of anything so I got to splurge on a few things! I spent $29 in total. I got milk, snacks and a few side dishes for dinners.
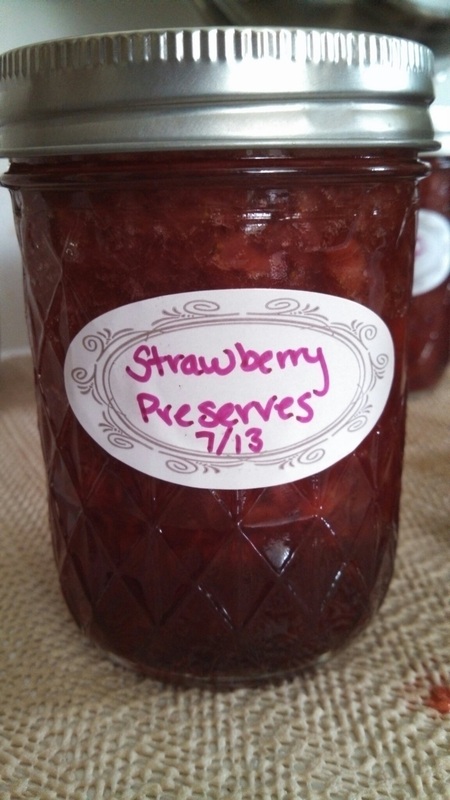
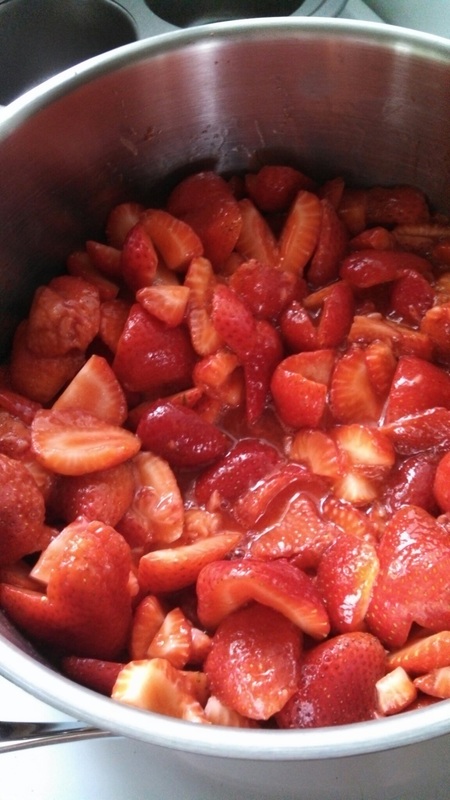
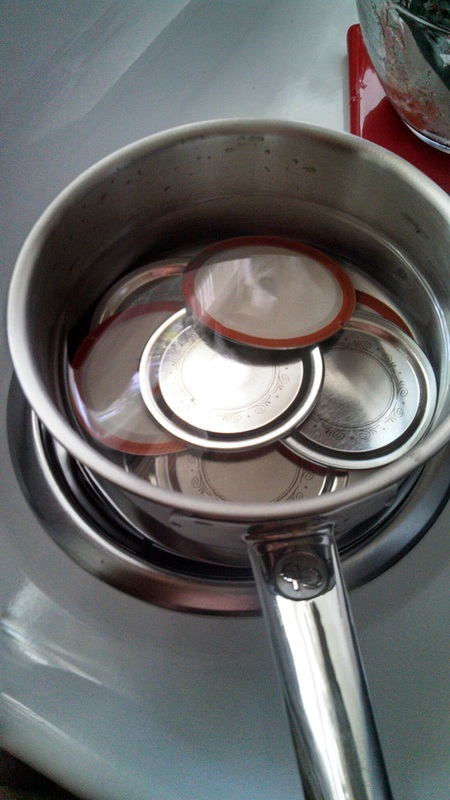
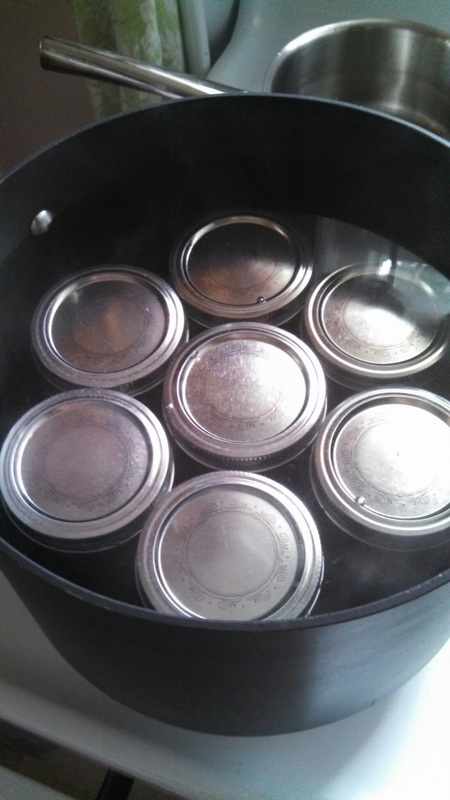
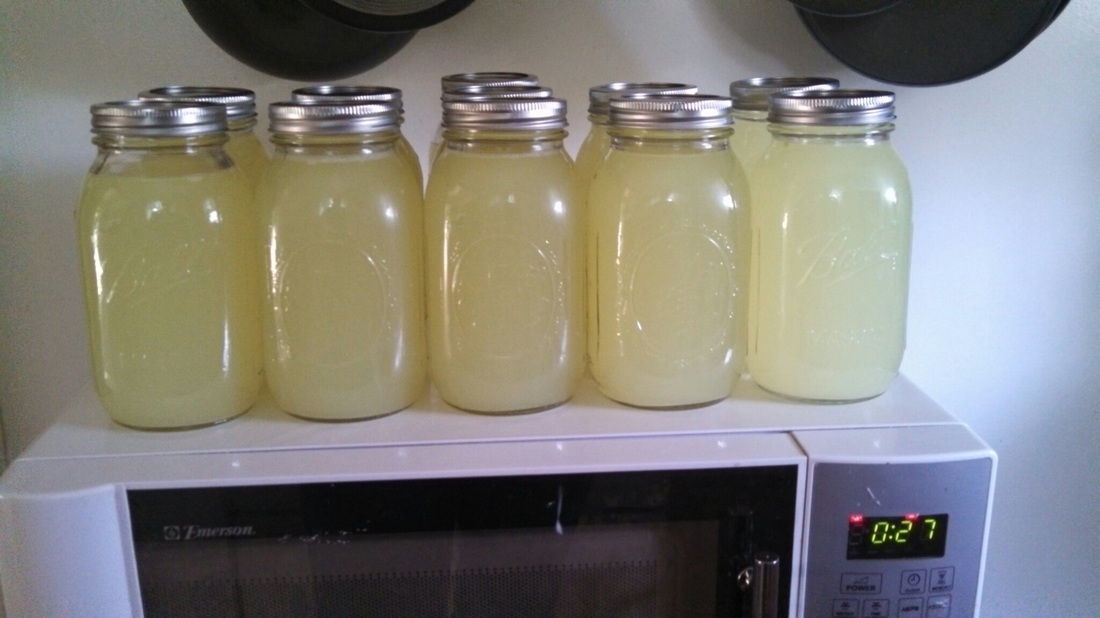
I went a little extra crazy and spent $13 on strawberries, lemons and sugar. I made Strawberry Preserves for the first time! They came out exquisite!
This past week, I've kept busy! I made our new soap dispenser ! This turned out being a lot easier than I had anticipated. I also tried making strawberry preserves. I made some pasta sauce from scratch. All the made from scratch cooking tastes so much better! I'd rather spend the time and not the money:)
I went grocery shopping on Monday. I didn't need to get much of anything so I got to splurge on a few things! I spent $29 in total. I got milk, snacks and a few side dishes for dinners.
I went a little extra crazy and spent $13 on strawberries, lemons and sugar. I made Strawberry Preserves for the first time! They came out exquisite!
This past week, I've kept busy! I made our new soap dispenser ! This turned out being a lot easier than I had anticipated. I also tried making strawberry preserves. I made some pasta sauce from scratch. All the made from scratch cooking tastes so much better! I'd rather spend the time and not the money:)


 RSS Feed